History of The Black Watch
‘In a Highland Regiment every individual feels that his conduct is the subject of observation and that, independently of his duty, as one member of a systematic whole he has a separate and individual reputation to sustain, which will be reflected on his family and district or glen.’
The words above are as relevant today as when they were written by a 19th century Black Watch historian. They lucidly illustrate that The Black Watch boasts a history of honour, gallantry and devoted service to King, Queen and country. The battles which have contributed most to The Black Watch history have been those in which the odds have been most formidable. From Fontenoy to Fallujah with Ticonderoga, Waterloo, Alamein and two World Wars in between the Black Watch has been there when the world’s history has been shaped.
The Black Watch has played a significant part in each of these bloody and mighty conflicts and the sheer scope and scale of The Black Watch’s contribution is what has nurtured a deep pride in this great Regiment.
The links below will take you through a short history of The Black Watch, taking in the most significant periods in its history, from its formation in 1739 to the amalgamation of the Regiment in 2006. For details of current operations, please see The Black Watch Today.
The Black Watch was raised in an unique way. In the wake of the 1715 Jacobite rebellion companies of trustworthy Highlanders were raised from loyal clans, Campbells, Grants, Frasers, Munros.
Six companies were formed from 1725 and stationed in small detachments across the Highlands to prevent fighting between the clans, deter raiding and assist in enforcing the laws against the carrying of weapons.
In 1739 King George II authorised the raising of four additional companies and these all to be formed into a Regiment of the Line of the regular army with the Earl of Crawford as the Colonel. The men were to be “natives of that country and none other to be taken”.
The first muster of the new Regiment took place near Aberfeldy the following year and is commemorated by a monument in the form of a soldier dressed in the uniform of those days.
In 1825, Stewart of Garth wrote that “Although the commissions of the officers were dated in October, and the following months of 1739, the men were not assembled until the month of May 1740. The whole were then mustered, and embodied into a regiment in a field between Taybridge and Aberfeldy, in the county of Perth…”
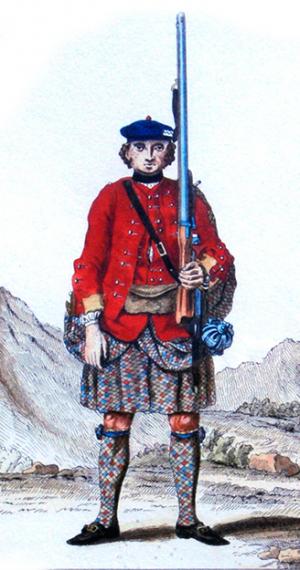
Illustration from George II’s “Cloathing Book” of a Black Watch soldier from this early period.
The Black Watch Dress
The original uniform was a twelve yard long plaid of the dark tartan which is now so well known as The Black Watch tartan. This was fastened around the body with a leather belt. The jacket and waistcoat were scarlet with buff facings and white lace and a blue bonnet was worn. The men were armed with a musket and bayonet, a broadsword and generally also a pistol and dirk (long dagger).
In 1825, Stewart of Garth wrote that “The uniform was a scarlet jacket and waistcoat, with buff facings and white lace, tartan plaid of twelve yards plaited round the middle of the body, the upper part being fixed on the left shoulder, ready to be thrown loose and wrapped over both shoulders and firelock in rainy weather. At night, the plaid served the purpose of a blanket, and was a sufficient covering for the Highlander.”

The Name
The title “The Black Watch” was derived from the dark colour of the tartan and the original role of the Regiment to “watch” the Highlands . The name has remained and is now incorporated in the official name of the Regiment.
In 1825, Stewart of Garth wrote that “The whole were then mustered … under the number of the 43d regiment, but they still retained the country name of the Black Watch.”
Mutiny
In 1743 the new regiment was ordered to march to London for an inspection by the King. However word had it that the Regiment was to be shipped to the unhealthy climate of the West Indies, a rumour which was reinforced when it was discovered that the King was not to inspect them. Many of the men genuinely believed they had been enlisted only for service in Scotland and decided to return home. Leaving London and marching by night over a hundred of them reached Northamptonshire before they were eventually surrounded and brought back to London. They were tried by court martial and three of the leaders were condemned to be shot in the Tower.
The remainder of the Regiment proceeded to Flanders for action against the French. It must remain a question for speculation whether the 1745 Rebellion could ever have taken place had The Black Watch been left fulfilling its role in policing the Highlands rather than being posted to the Continent two years previously.

Contemporary print of Farquhar Shaw, the accused leader of the Mutiny.
The remainder of the Regiment proceeded to Flanders for action against the French. It must remain a question for speculation whether the 1745 Rebellion could ever have taken place had The Black Watch been left fulfilling its role in policing the Highlands rather than being posted to the Continent two years previously.
Fontenoy
The Regiment was first in action at the Battle of Fontenoy in 1745. Although this was a British defeat, The Black Watch gained great distinction by its conduct being described by a French officer as “Highland Furies who rushed in on us with more violence than ever did the sea driven by tempest”.

“Fontenoy 1745” by Skeoch Cumming
Ticonderoga
The Regiment was next engaged in the French-Indian War and especially at the Battle of Ticonderoga in 1758 where during the attack on the fort of that name more than half the men became casualties. By this time the Regiment had been allocated the numerical slot “42nd” in seniority, a number which it was to render illustrious all over the world. In recognition of its worth it was now granted the title “Royal” and raised a Second Battalion. In 1786 this battalion became a separate regiment in its own right, the 73rd, and was much in action in India and Ceylon, playing a prominent part in the capture of Mysore and Seringapatam.
The Americas
Meanwhile the 42nd had been busy in the West Indies in Guadaloupe in 1759 and in Martinique and Havanna for which it was to receive its first battle honours. It was later deployed to North America where it became involved in the American War of Independence. The Regiment took part in the successful action at Brooklyn, New York against George Washington’s forces in 1776 and undertook much skirmishing against the rebels during the remainder of that war.
The Red Hackle
It was in 1795 that The Black Watch is known to have adopted the Red Hackle in its bonnets, the most distinctive feature of the Regiment’s uniform. The stories relating to its origin are numerous but it was certainly issued to the men at Royston, Hertfordshire that year. Others began to copy this but in 1822 an Army Order laid down that it was “to be used exclusively by the 42nd Regiment”. Since then it has been worn in action in many parts of the World and is a much prized distinguishing mark.

Alexandria
The next 15 years of the Regiment’s history were to be dominated by action against the French. The first campaign was in Egypt in 1801 where after a successful assault landing the 42nd fought with great distinction at the Battle of Alexandria, capturing the Colour of Napoleon’s “Invincible” Legion. For its gallantry the Regiment won the honour of bearing the Sphinx on its Colours and badge. opposite: Death of General Sir Ralph Abercromby at the Battle of Alexandria March 1801.
Peninsular War
No fewer than ten battle honours were awarded to the Regiment for its part in the continued fight against Napoleon’s armies during the six years of the Peninsular War in Spain and Portugal. It was committed early, for in 1809 it took part in Sir John Moore’s gruelling winter retreat through the mountains to Corunna, where it played a prominent part in the action covering the embarkation. The following year another battalion of the Regiment joined the Duke of Wellington’s Army and was present at many of his famous victories including the final one at Toulouse in France in April 1814. By the end of that battle less than 60 men of the Battalion remained unwounded. opposite: “Attack of French Chasseurs on 42nd RH Regt at the Battle of Orthes February 1814″. Sketch by Thomas McNiven who fought in this action as an officer in the Regiment”.
Waterloo Campaign
During Napoleon’s final campaign of 1815 both the 42nd and the 73rd which were to become respectively the 1st and 2nd Battalions of The Black Watch played significant parts. They were first in action together at Quatre Bras on the 16th of June where they were hard pressed by French cavalry. Mistaking them for allies the 42nd had not time to form a defensive square and had a tough fight repulsing them. Two days later at the Battle of Waterloo it was the 73rd which was in the thickest of the fighting and subject to heavy losses from the French cannon.

“The Black Watch at Bay” The Battle of Quatre Bras 16 June 1815. Oil painting by W R Wollen RI.
Crimean War
After almost 40 years of peace since Waterloo the 42nd formed part of the Highland Brigade during the war with Russia in the Crimea. Its most notable action was in the very first engagement at the Battle of the Alma in September 1854. Positioned on the right of the Brigade, it was with the order “Forward the 42nd” that the Commander, Sir Colin Campbell sent the Regiment up the heights to encounter the enemy who were driven back to their base in Sebastopol. There the Regiment shared in all the dangers and tribulations of work in the trenches before the town for nearly 18 months.

“Forward the 42nd” Portion of the print of the Battle of the Alma showing the Colour Party.
Indian Mutiny
Almost immediately after the Crimean War the Regiment was despatched to India to help quell the Mutiny. There it was first in action at Cawnpore and then, early in 1858, at the relief of Lucknow. It was there that Lieutenant Farquharson won the first of the Regiment’s fourteen Victoria Crosses. After the eventual capture of Lucknow, the Regiment was employed in the flying columns sent out to subdue areas remaining in rebel hands. This involved much fierce fighting and marching large distances.
For more information, please see the FIBIS wiki pages on the Indian Mutiny and The Black Watch in India.

Lieutenant Farquharson winning his VC at Lucknow 1858 by Desanges
Egypt and the Sudan
This period first saw the 73rd in South Africa taking part in the Frontier Wars. A large number of reinforcements for the Regiment on the troopship “Birkenhead” lost their lives when it sank in 1852. The discipline of the troops aboard, allowing the women and children to escape, has become a legend. In 1874 the 42nd played the leading role in the Ashanti Campaign in West Africa during the successful advance to Coomassie through dense jungle. It was in 1881 that the 42nd and 73rd were reunited as the 1st and 2nd Battalions of The Black Watch respectively. The 1st Battalion was then to be the next in action in Africa taking part in the Highland Brigade’s dawn assault on the Egyptian position at Tel-el-Kebir in 1882. Two years later it was in the thick of the fight with the Mahdi’s fanatical tribesmen at El Teb and Tamai – and the following year 1885 saw it taking part in the Nile Expedition and fighting at Kirbekan and Abu Klea.
The Boer War
Only a month after the declaration of war by the Boers in late 1899, the 2nd Battalion arrived in South Africa. There it was to be part of the Highland Brigade in the column sent to the relief of Kimberley. Unfortunately the Brigade was soon committed to a disastrous dawn attack on Boer positions at Magersfontein.
No proper reconnaissance had been carried out and the night advance was delayed by a storm, by thorn bushes and barbed wire. The 2nd Battalion, in the lead, was caught in the open in daylight and subjected to rapid and accurate fire from the Boer entrenchments. Despite gallant efforts to reach these trenches the Battalion was pinned down all day, losing over 300 killed or wounded.
Two months after Magersfontein the 2nd Battalion was in action again at Koodoosberg, a battle which cleared the route to Kimberley.

Magersfontein “No Surrender” Oil painting by Frank Feller.
Amongst those of the Regiment killed in action was Lieutenant Freddy Tait, the Amateur Golf Champion. Shortly afterwards the Boers were encircled at Paardeberg. There the Highland Brigade was required to put in an attack across the open veldt. It did so in extended order and without the losses incurred at Magersfontein.
The Boers trapped at Paardeberg surrendered and the Orange Free State Capital, Bloemfontein was captured.

A section of 2nd Battalion under Sergeant Johnstone equipped for action in South Africa 1900″
1901-1902
There were to be two more years before the Boers accepted defeat, years in which the British forces experienced the frustrations of a guerrilla war. No longer were there Boer armies, only smaller groups which would engage the troops at long range then try and disengage before contact could be made. Eventually this was defeated by restricting movement with block houses and wire fences. This strategy required a huge number of troops in small detachments.
The 1st Battalion joined the 2nd on active service in December 1901 and they had an historic meeting at Harrismith.
1914
On the outbreak of war there were seven Black Watch battalions – for in addition to the Regular 1st and 2nd Battalions and 3rd (Special Reserve) Battalion there were a further four Territorial ones which had become part of the Regiment in 1908. They were the 4th Dundee, 5th Angus, 6th Perthshire and the 7th Battalion from Fife.
The 1st Battalion was in action at the very start of the war taking part in the Retreat from Mons before turning on the Germans at the River Marne and the subsequent advance to the Aisne. Trench warfare then set in and the 2nd Battalion arrived from India, both battalions taking part in the Battle of Givenchy. Meanwhile the Territorial battalions had been mobilised at the start of the war but only the 5th was in action in 1914.

Trench warfare soon set in. This photograph shows men of The Black Watch manning a typical trench”.
The 1st Battalion was in action at the very start of the war taking part in the Retreat from Mons before turning on the Germans at the River Marne and the subsequent advance to the Aisne. Trench warfare then set in and the 2nd Battalion arrived from India, both battalions taking part in the Battle of Givenchy. Meanwhile the Territorial battalions had been mobilised at the start of the war but only the 5th was in action in 1914.
1915
This year was to see the participation of all the Territorial battalions and some of the newly formed “Service Battalions” of the Regiment in the battles along the Western Front. The 2nd, 4th and 5th Battalions were at Neuve Chapelle in March and a total of six battalions fought at Festubert in May where two Victoria Crosses were won by members of the Regiment. Then in September came the initially successful but horrifically costly attacks at Loos in which the 9th Battalion suffered over 700 casualties.

Members of D Company, 4th Battalion The Black Watch on their objective after the Battle of Neuve Chapelle March 1915.
1916
The 2nd Battalion was withdrawn from France for operations against the Turks in Mesopotamia for the attempted relief of Kut-el-Amara. Such was the urgency to get forward that the advance was made without proper preparation and heavy casualties were incurred. The losses at Shaikh Sa’ad were so heavy that the Battalion had to be merged temporarily with another Highland battalion which had suffered similarly.

The Pipes & Drums playing after the initial capture of Longueval by the 8th Battalion. It was to change hands again frequently over the next five days.
This year also saw the 10th Battalion taking part in operations in the Balkans. On the Western Front, 1916 was dominated by the Battle of the Somme. Five battalions of the Regiment were involved with particularly fierce actions at Contalmaison, High Wood, Delville Wood and Longueval – the last named changing frequently as the Germans counter-attacked and further assaults were made to regain it. Eventually it was held but by then the 8th Battalion was reduced to just 171 men. The year ended with the extremely hard fought battle at Beaumont-Hamel with the 6th and 7th Battalions particularly distinguishing themselves.
1917
April saw the launch of the 1st Battle of Arras. With the support of some of the first tanks, with more sophisticated artillery fire and improved tactics the five Black Watch battalions involved made some progress. They then held on tenaciously to the gains made at such cost against fierce counter attacks. Subsequent attacks in the Second and Third Battles were less successful but equally costly in lives.
The Pipes & Drums playing after the initial capture of Longueval by the 8th Battalion. It was to change hands again frequently over the next five days.
July saw six battalions of the Regiment taking part in the Third Battle of Ypres and the endeavours to extend the Salient. In this the 4/5 Battalion was reduced to no more than company strength, indicative of the terrible losses and conditions at Passchendaele. However the 6th and 7th Battalions were taken back to train with tanks for the initially successful Battle of Cambrai. Advancing behind the tanks and passing through each other the battalions made significant gains but most of this ground was later to be lost to German counter attacks. Meanwhile in Mesopotamia the 2nd Battalion had taken part in the fight for Sannaiyat and in March had entered Bagdad before fighting across the desert to Mushaidie and thence to the ferocious action at Istabulat. There Private Melvin won the VC for single handedly overcoming a group of nine Turks.
1918
After the conclusion of operations in Mesopotamia the 2nd Battalion moved to Palestine and took part in Allenby’s eminently successful action at Megiddo in September. In France the spring brought in the final massive German offensive. In a confused withdrawal all the battalions suffered heavy losses, those of the 9th at Arras being so great that it had to amalgamate with the 4th/5th.

Men of the 1st Battalion at Roisdorf in Germany at the conclusion of the First World War.
Attack followed attack through March and April until the German offensive was exhausted. Then came the long fight to recover the lost ground. At Chambrecy the 6th Battalion, attacking alongside a French unit, was awarded the Croix de Guerre for its bravery – a distinction still worn by the Territorial soldiers of the Regiment. By September the 1st Battalion was involved in the successful attack on the last German fortified trench system, the Hindenberg Line. By the time of the Armistice in November 8000 members of the Regiment had lost their lives during the four years of this terrible conflict.
1940
When war broke out with Nazi Germany in September 1939 the 2nd Battalion was already on active service in Palestine and was to be deployed in a successful rearguard action against overwhelming Italian forces in Somaliland in July 1940. It was then sent to Crete to help defend the island from the anticipated German invasion. Meanwhile the 1st, 4th and 6th Battalions had been despatched to France where they faced the German blitzkrieg in May 1940.
Against this massive armoured assault the ill-equipped British troops were forced to withdraw to Dunkirk . The 4th and 6th Battalions were successfully evacuated from France but the 1st Battalion, with most of the 51st Highland Division, was less fortunate. When it proved impossible to rescue the Division it was ordered to surrender at St Valery.

After evacuation from Dunkirk the 6th Battalion was deployed in the defence of the Isle of Wight.
Against this massive armoured assault the ill-equipped British troops were forced to withdraw to Dunkirk . The 4th and 6th Battalions were successfully evacuated from France but the 1st Battalion, with most of the 51st Highland Division, was less fortunate. When it proved impossible to rescue the Division it was ordered to surrender at St Valery.
North Africa
May 1941 saw the first ever airborne assault take place when German paratroopers descended on the 2nd Battalion at Heraklion in the north of Crete. The initial offensive was most effectively repulsed but later landings elsewhere forced the withdrawal of the garrison.
Five months later the Battalion was moved to the besieged fortress of Tobruk and in November was to suffer very heavy losses in the attempted breakout to link up with the 8th Army. The tanks failed to provide the planned support and within one hour over 300 men had become casualties – but the objective was taken.

Survivors of the 2nd Battalion’s break out from Tobruk in November 1941 hold captured trenches.
In August 1942 the re-formed 1st Battalion along with the 5th and 7th Battalions arrived in North Africa as part of 51st Highland Division in time to take part in the momentous battle of El Alamein, the turning point in the War. This was to be followed by the pursuit across the North African desert with the many hard-fought victories notably Mareth and Wadi Akarit and the triumphant entry into Tripoli. During 1943 the 6th Battalion also became involved in the North African campaign, joining the 1st Army and taking particular part in the attack on Sidi Medienne.
Five months later the Battalion was moved to the besieged fortress of Tobruk and in November was to suffer very heavy losses in the attempted breakout to link up with the 8th Army. The tanks failed to provide the planned support and within one hour over 300 men had become casualties – but the objective was taken.In August 1942 the re-formed 1st Battalion along with the 5th and 7th Battalions arrived in North Africa as part of 51st Highland Division in time to take part in the momentous battle of El Alamein, the turning point in the War. This was to be followed by the pursuit across the North African desert with the many hard-fought victories notably Mareth and Wadi Akarit and the triumphant entry into Tripoli. During 1943 the 6th Battalion also became involved in the North African campaign, joining the 1st Army and taking particular part in the attack on Sidi Medienne.
Italy
In July 1943 the 51st Highland Division spearheaded the invasion of Sicily, the first Allied return to Europe. After a successful assault landing the Allies met increasingly stiff German opposition as they advanced over ground dominated by Mount Etna. After heavy fighting by the 1st Battalion at Gerbini and by all at Sferro, Sicily was conquered. The 51st Highland Division returned home to prepare for the invasion of Normandy.

6 pounder anti tank detachment of 6th Battalion relax near Monte Cassino in May 1944.
However the 6th Battalion was to remain in Italy, taking part in the hard-fought advance North against the several well prepared German defensive lines and most particularly at Monte Cassino. Its final actions were in the battles of the Gothic Line at Forli after which it was despatched to Greece in December 1944 to counter Communist partisans.
North West Europe
The 1st, 5th and 7th Battalions, still in the 51st Highland Division, were all landed in Normandy on or shortly after D Day, 6 June 1944. They were heavily involved in the actions leading to the breakout from Caen and the Falaise Gap, the 5th Battalion in particular experiencing severe fighting at Breville and Colombelles. There was then little action for the Regiment except for the capture of Le Havre until the autumn and winter fighting in the low lying country astride the River Maas in Holland.

Men of the 7th Battalion move forward to cross the Rhine in March 1945 where they were to be the first to reach the far bank.
All three battalions were employed in the operations to stem the last German offensive into the Ardennes in the bitter weather of January 1945. It was then back to the battles of the Reichswald Forest on the Dutch-German border with the 1st Battalion being the first Allied troops on German territory. Then on the 23rd March 1945 the Regiment played a key role in the Crossing of the Rhine under a massive smoke screen and overcoming the final, albeit crumbling, German resistance.
Burma
After its enormously varied war fighting in Somaliland, in Crete and at Tobruk, the 2nd Battalion was sent to India, which was under threat from the rapid Japanese advance through Malaya and Burma. There it was specially trained for participation in the Second Chindit Expedition. Divided into two columns and often working in smaller groups, the Battalion spent 5 months operating behind the Japanese lines, disrupting their communications, their supplies and flow of reinforcements.

Loading mules into aircraft for the 2nd Battalions part as Chindits, operating behind Japanese lines in Burma.
Resupplied entirely by air drop the columns attacked and ambushed enemy columns in savage actions, generally in thick jungle and in appalling conditions of heat and disease, made worse once the monsoon broke. The Battalion ended the War training as a parachute unit for the planned invasion of Malaya.
For more information about some of the men who served with the Chindits:
Post War
At the end of the Second World War the 2nd Battalion was still in India and found itself involved in attempting to prevent the fighting across the religious divide leading up to Partition. Men of the Regiment were to be the last British troops to leave Pakistan in 1948 as indeed they were to be the last to leave Hong Kong when it was handed over to China in 1997. The 2nd Battalion was then amalgamated briefly with the 1st but was re-formed again during the Korean War for a further four years until disbanded in 1956. The four Territorial battalions of the Regiment which had won such distinction during both World Wars were reduced to two after 1945 and further cuts were made in 1967.
Korea
In 1952 the 1st Battalion sailed to Korea to be part of the Commonwealth Division in the United Nation force containing the Chinese invasion of South Korea. There it took over a vital position known as “The Hook” from American troops. On 19 November 1952 it was subjected to attack by waves of Chinese troops attempting to take the position.
After stiff hand to hand fighting and even having to resort to bringing artillery fire onto its own defensive positions, the Battalion succeeded in fighting off the hordes of attackers. The Hook became the Regiment’s 151st and most recent battle honour.

A fighting patrol from the 1st Battalion prepares for its mission to prevent Chinese infiltration of the Battalion’s defences in Korea 1952.
After stiff hand to hand fighting and even having to resort to bringing artillery fire onto its own defensive positions, the Battalion succeeded in fighting off the hordes of attackers. The Hook became the Regiment’s 151st and most recent battle honour.
Peacekeeping
Immediately after action in the Korean War the Battalion was deployed to Kenya in 1953 to help suppress the Mau-Mau Rebellion. Five years later it was to be involved in a similar role in Cyprus against EOKA Terrorists and was to be on the island again in 1966 as United Nations troops.
This peacekeeping role was one with which the Battalion was to become increasingly familiar, notably in Northern Ireland from 1970 onwards when it undertook frequent operational deployments to the Province. In all these operations the Regiment was undertaking a role very similar to that for which it was originally raised over 250 years ago – to police the Highlands of Scotland. It is a role which it has recently carried out in the Balkans.

Peacekeeping in Northern Ireland, a mobile patrol is briefed on its task to prevent the movement of terrorist weapons.
This peacekeeping role was one with which the Battalion was to become increasingly familiar, notably in Northern Ireland from 1970 onwards when it undertook frequent operational deployments to the Province. In all these operations the Regiment was undertaking a role very similar to that for which it was originally raised over 250 years ago – to police the Highlands of Scotland. It is a role which it has recently carried out in the Balkans.
Iraq 2003 – 2004
In March 2003 the 1st Battalion The Black Watch took part in the American led invasion of Iraq. As an armoured battlegroup it was at the forefront of the fighting to capture Al Zubayr and the then much larger city of Basrah. This developed into a counter insurgency and peacekeeping operation until the Battalion was withdrawn in June 2003.

Warrior Armoured Fighting Vehicles of the Black Watch Battlegroup cross the Saddam Bridge.
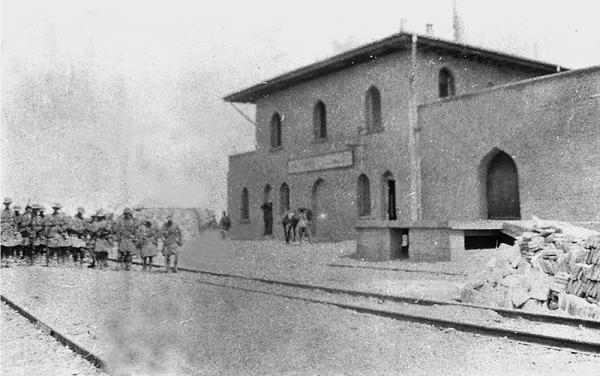
In July 2004 the Battalion was recalled to Iraq where the situation had deteriorated. After initial deployment in the British Sector the Battalion moved in October some 670 kilometres towards Baghdad to support US forces involved in clearing Fallujah of resistance. The intensity of the fighting during the operation was similar to that of the war the previous year.
The 73rd Regiment plays an important part in the early history of the Black Watch.
In 1881 it rejoined the 42nd Regiment to form The Black Watch (Royal Highlanders), of which the 73rdbecame the 2nd Battalion.
During its 95 year history the 73rdRegiment served worldwide. It first campaigned in India, where it won its first major victory against Tippoo Sahib at Seringapatam in 1799. It quashed mutinying British colonists in New South Wales between 1810 and 1813 and a short lived 2nd Battalion (1808-17) fought Napoleon at Waterloo in 1815. In 1838 and 1839 the Regiment quelled unrest in Canada and then fought in the South African Frontier Wars from 1846 until 1858. In 1858 it also arrived in Calcutta, where it helped suppress the Indian Mutiny. In addition to overseas duties, the Regiment kept the peace at home by putting down riots in the manufacturing towns of Yorkshire in 1826.
In 1862 the 73rd was redesignated the 73rd (Perthshire) Regiment and received new Colours. It finally rejoined with the 42nd in 1881.

The 73rd Regiment in India
India was a central part of the British Empire in the 18thCentury. Though the East India Company directed trade and largely controlled the region, the British Government’s influence steadily increased. For this reason the army’s role became very important.
The Indian sub-continent is central to the history of the 73rd Regiment. It first served there as part of the 2ndBattalion of the 42nd Regiment when in 1784 it defended the fortress of Mangalore from Tippoo Sahib, the ruler of Mysore in South-East India. The British surrendered honourably when provisions ran out. The 73rd Regiment received “Mangalore” as a battle honour and were famed for their performance there.
Commanders deemed the “Highland” dress of the 42ndRegiment, from which the 73rd came, unsuitable for the conditions in India. Linen trousers therefore replaced the kilt in 1799 and the 73rd Regiment continued to wear trousers throughout its history.
The Battle of Seringapatam
In 1798 Tippoo Sahib was discovered to be in league with the French. The following year the British Governor General, Richard Wellesley, sent two armies to Mysore. Tippoo Sahib retreated to his Fortress of Seringapatam. The British army besieged the palace and after 14 days, on the 4th May, they attacked and captured it, killing Tippoo Sahib. This ended the Fourth Mysore War and restored the kingdom to British control. The 73rd Regiment fought in the right hand column of the British force. They lost 21 men and 99 suffered injuries. They also garrisoned the fortress after its capture.

Portion of an 1803 print of The Storming of Seringapatam. The original oil painting dates to 1800 and is the work of Robert Kerr Porter (1777-1842). It depicts the Union flag being planted on the fortress, an indication that the British would win the battle.
The 73rd Regiment received the battle honour “Seringapatam”. The Earl of Mornington wrote that the attack had “raised the reputation of the British Army in India to a degree of splendour and glory unrivalled in the military history of this quarter of the globe.”
The Birkenhead Disaster
In the early hours of 26th February 1852 Her Majesty’s steamer the Birkenhead hit a rock off Danger Point, near Cape Town. It had been carrying 638 troops to South Africa to fight in the Frontier Wars and the 73rd Regiment comprised the largest contingent onboard. The rock penetrated the hull and many soldiers on the lower decks drowned.
Order was kept and the women and children were evacuated to the lifeboats. It is thought that the tradition of “women and children first”, known as The Birkenhead Drill, comes from this event. The wife of a corporal reportedly removed two claret jugs from the sinking ship and hid them beneath her skirts before boarding a lifeboat. They were bought back by the 73rd Regiment after being found in a London sale room a few years later and can now be seen at the Museum of the Black Watch.

The Wreck of the Birkenhead by Lance Calkin (1859-1936), Oil on Canvas
Order was kept and the women and children were evacuated to the lifeboats. It is thought that the tradition of “women and children first”, known as The Birkenhead Drill, comes from this event. The wife of a corporal reportedly removed two claret jugs from the sinking ship and hid them beneath her skirts before boarding a lifeboat. They were bought back by the 73rd Regiment after being found in a London sale room a few years later and can now be seen at the Museum of the Black Watch.
When the ship broke in half soldiers on board were ordered not to swim to the lifeboats for fear of swamping them. As a result many were left on board when the Birkenhead sank. Some survived by clinging to driftwood and others by clinging to the mast and rigging, which remained above the surface. A few made it to the shore and other vessels rescued those who survive at sea. In total 438 drowned, including 56 from the 73rd Regiment. All the women and children were saved.
Captain Edward Wright of the 91st Regiment, who was onboard the ship, noted that during the ordeal “everyone did as he was directed” and was impressed that all was conducted “with so little noise and confusion.” The Duke of Wellington later praised those onboard for their conduct.

The claret jugs taken from the Birkenhead during the disaster.
The Frontier Wars
Between 1806 and 1879 nine wars took place between British forces and the Xhosa people of South Africa after they began taking over Boer settlements. The 73rdRegiment took part in these between 1848 and 1853.
The Xhosa regularly attacked British military villages along the frontier, which the 73rdwere subsequently ordered to protect. They chaperoned supply wagons, took the enemy’s cattle and resisted guerrilla style attacks from the mountains. For soldiers of the 73rd Regiment, life during the campaign consisted of long marches and poor conditions. In his diary, Captain Knox complained of marching for 16 hours without food and Private John Rich recorded that he had marched for 34 days without changing his clothes.
Private Rich also complained that the rations he received would not have been sufficient even for a child. “How”, he asked in his diary, “have our rations been invented to subsist a soldier on the frontier of South Africa, in wartime, when I have been marching for sixteen and eighteen hours out of twenty-four?” The Regimental History states that “Men and officers were exposed to wet and sultry weather and performed many long and harassing marches.” A new low occurred in 1852 when the Birkenhead, carrying troops to the Frontier Wars, sank, resulting in the deaths of 438 soldiers, including 56 from the 73rd Regiment.

A shako worn by officers in the 73rd Regiment from 1844 until 1855.
Private Rich also complained that the rations he received would not have been sufficient even for a child. “How”, he asked in his diary, “have our rations been invented to subsist a soldier on the frontier of South Africa, in wartime, when I have been marching for sixteen and eighteen hours out of twenty-four?” The Regimental History states that “Men and officers were exposed to wet and sultry weather and performed many long and harassing marches.” A new low occurred in 1852 when the Birkenhead, carrying troops to the Frontier Wars, sank, resulting in the deaths of 438 soldiers, including 56 from the 73rd Regiment.
Not everything in South Africa was bad. When they were not fighting soldiers played sports and drank wine and port, though drunkeness was severly punished; Private Rich narrowly escaped a flogging for intoxication. In 1851 Captain Knox wrote that he had “a hell of a dinner, singing songs and playing the fiddle all evening” and on another occasion he said that he had gotten “rather tight.”
Colonels-in-Chief were Royal patrons. They provided a link between the Regiment and the Royal Family. This role was symbolic of the monarch’s role as leader of the armed forces.
The position of Colonel-in-Chief is distinct from that of Colonel of the Regiment. They do not have an operational role. They are however kept informed of all important activities of the regiment, and pay occasional visits to its operational units. The Black Watch has had only three Colonels-in-Chief during its history:
- His Majesty King George V (1912-1936)
- Her Majesty Queen Elizabeth The Queen Mother (1937-2002)
- His Royal Highness The Prince Charles Duke of Rothesay (2003-2006)
In 2006, Queen Elizabeth became Colonel-in-Chief of The Royal Regiment of Scotland. The Duke of Rothesay remains Royal Colonel of The Black Watch, 3rd Battalion The Royal Regiment of Scotland.

Colonel-in-Chief uniform of George V
Victoria Cross Recipients
The Victoria Cross is the highest British award, which may be given for gallantry in the face of the enemy.
The Decoration, which was instituted by Queen Victoria on 29 January 1856, may be conferred upon officers, non-commissioned officers and men of all the armed forces. It ranks above all other British Orders and Decorations. This, however, is established by custom only, not by statute.
It is a cross patte of bronze, made from metal from one of the Russian guns captured at Sebastopol. In the centre is the Royal Crest over a scroll bearing the words For Valour. The date of the act of bravery is given on the reverse and the recipient’s name is engraved on the back of the bar. The holders receive a tax-free annuity and are entitled to add the letters VC after their name.

Indian Mutiny Lucknow, 9th March 1858
Citation: For conspicuous bravery, when engaged before Lucknow, on 9 March 1858, in having led a portion of his company, stormed a bastion mounting two guns, and spiked the guns, by which the advanced position held during the night of 9th March was rendered secure from the fire of artillery. Lieutenant Farquharson was severely wounded, while holding an advanced position on the morning of 10th of March.
The Black Watch Medal Roll, 1801-1911, John Stewart (Ed.), p 290

Indian Mutiny Fort Ruhya, 15th April 1858
Citation: For conspicuous bravery at the attack on the fort of Ruhya on 15th April 1858, in having volunteered to go to an exposed point within 40 yards of the parapet of the fort under a heavy fire, and brought in, First Lieutenant Douglas, and afterwards a private soldier, both of whom were dangerously wounded.
The Black Watch Medal Roll, 1801-1911, John Stewart (Ed.), p 290

Indian Mutiny Fort Ruhya, 15th April 1858
Citation: For daring gallantry on 15 April 1858, when at the attack of the fort of Ruhya, in having volunteered to assist Capt Cafe, commanding the 4th Punjab Rifles, in bringing the body of Lieutenant Willoughby, of that corps, from the top of the glacis, in a most exposed situation under a heavy fire.
The Black Watch Medal Roll, 1801-1911, John Stewart (Ed.), p 290

Indian Mutiny Fort Ruhya, 15th April 1858
Citation: For conspicuous gallantry on the fort of Ruhya, when with an advanced party to point out the gate of the fort to the Engineer officer, Private Davis offered to carry the body of Lieutenant Bramley, who was killed at the point, to the regiment. He performed this duty of danger and affection under the very walls of the fort.
The Black Watch Medal Roll, 1801-1911, John Stewart (Ed.), p 289

Indian Mutiny Fort Ruhya, 15th April 1858
Private Edward Spence would have been recommended to Her Majesty for the decoration of ‘The Victoria Cross’ had he survived. He and Lance-Corporal Thompson volunteered, at the attack on the fort of Ruhya on the 15th of April 1858, to assist Captain Café, commanding the 4th Punjab Rifles, in bringing back the body of Lieutenant Willoughby from the top of the glacis.
Private Spence dauntlessly placed himself in an exposed position, so as to cover the party bearing away the body. He died on the 17th of the same month from the effects of the wounded which he received on the occasion.
The decoration earned by Private Spence was awarded to his relatives by His Majesty King Edward VII, the notification appearing in the London Gazette dated 15th January 1907.
The Black Watch Medal Roll, 1801-1911, John Stewart (Ed.), p 289, 290
Indian Mutiny Bareilly, 5th May 1858
Citation: For his conspicuous and gallant conduct on the morning of the 5th May, in having saved the life of Lieutenant-Colonel Cameron, his commanding officer, who, during the action of Bareilly, on that day had been knocked from his horse, when three fanatics rushed upon him. Colour-Sergeant Gardner ran out, and in a moment bayoneted two of them, and was in the act of attacking the third, when he was shot down by another soldier of the regiment.
The Black Watch Medal Roll, 1801-1911, John Stewart (Ed.), p 290

Indian Mutiny Sissaya Ghat, 15th January 1859
Citation: In the action at Maylah Ghaut, on the 15th January 1859, Brigadier General Walpole reports that the conduct of Privates Cook and Millar deserves to be particularly pointed out.
At the time the fight was severest, and the few men of the 42nd Regiment were skirmishing so close to the enemy(who were in great numbers) that some of the men were wounded by sword cuts, and the only officer of the 42nd was carried to the rear severely wounded, and the Colour Sergeant was killed, these soldiers went to the front, took a prominent part in directing the Company, and displayed a courage, coolness, and discipline which was the admiration of all who witnessed it.
The Black Watch Medal Roll, 1801-1911, John Stewart (Ed.), p 289
Indian Mutiny Sissaya Ghat, 15th January 1859
Citation: In the action at Maylah Ghaut, on the 15th January 1859, Brigadier General Walpole reports that the conduct of Privates Cook and Millar deserves to be particularly pointed out. At the time the fight was severest, and the few men of the 42nd Regiment were skirmishing so close to the enemy(who were in great numbers) that some of the men were wounded by sword cuts, and the only officer of the 42nd was carried to the rear severely wounded, and the Colour Sergeant was killed, these soldiers went to the front, took a prominent part in directing the Company, and displayed a courage, coolness, and discipline which was the admiration of all who witnessed it.
The Black Watch Medal Roll, 1801-1911, John Stewart (Ed.), p 289

Ashanti War Amoaful, 31st January 1874
Citation: At Amoaful, on the 31st January 1874, skilfully leading his section through the bush for a whole day, although badly wounded early in the battle.
The Black Watch Medal Roll, 1801-1911, John Stewart (Ed.), p 290

Egyptian Campaigns Tamaai, 13th March 1884
Citation: At Tamaai, on the 13th March 1884, defending a gun, and though wounded, remaining by it throughout.
The Black Watch Medal Roll, 1801-1911, John Stewart (Ed.), p 290

First World War Rue du Bois, 9th May 1915
Citation: For most conspicuous bravery at Rue de Bois, on 9/5/1915.
When leading his section on the right of the right platoon in the assault he was the first man of the Battalion to ascend the enemy’s parapet and from there he directed those following him to the gaps in the German wire entanglements, he then led his Section through a break in the parapet to a second line of trench which had previously been decided upon as the final objective in this part of the line.
In that position Cpl Ripley with 7 or 8 men established himself, blocking both flanks and arranging a fire position until all his men had fallen and he himself had been badly wounded in the head.

David Finlay was the son of George Finlay and Susan Small. He was born in Guardbridge, Fife.
Finlay was awarded to Victoria Cross for actions on 9th May 1915 at Rue de Bois, France. The citation reads as follows:
For most conspicuous bravery and devotion to duty on 9th May 1915 near Rue de Bois, when he led a bombing party of twelve men with the greatest gallantry in the attack until ten of them had fallen. Lance Corporal Finlay then ordered the two survivors to crawl back, and he himself went to the assistance of a wounded man and carried him over a distance of 100 yards of fire-swept ground into cover, quite regardless of his own personal safety.
Finlay is commemorated on the war memorial in Moonzie, Fife, and on the Leuchars Parish War Memorial in Leuchars, Fife.
Finlay’s Victoria Cross and service medals are on display in our First World War Gallery. He is remembered in our Rolls of Honour in our Remembrance Room.

First World War Istabulat, 21st April 1917
Citation: For most conspicuous bravery, coolness and resource in action. Pte Melvin’s Company had advanced to within fifty yards of the front line trench of a redoubt, where, owing to the intensity of the enemy’s fire, the men were obliged to lie down and wait for reinforcements.
Pte Melvin, however, rushed on by himself, over ground swept from end to end by rifle and machine-gun fire. On reaching the enemy trench he halted and fired two or three shots into it, killing one or two enemy, but as the others in the trench continued to fire at him, he jumped into it, and attacked them with his bayonet in his hand, as, owing to his rifle being damaged, it was not ‘fixed.’

On being attacked in this resolute manner most of the enemy fled to their second line, but not before Pte Melvin had killed two or more and succeeded in disarming eight unwounded and one wounded.
Pte Melvin bound up the wounds of the wounded man, and then driving the eight unwounded prisoners before him, and supporting the wounded one, he hustled them out of the trench and marched them in and delivered them over to an officer.
He then provided himself with a load of ammunition and returned to the firing line, where he reported himself to his platoon sergeant. All this was done, not only under intense rifle and machine gun fire, but the whole way back Pte Melvin and his party were exposed to a very heavy artillery barrage fire. Throughout the day Pte Melvin greatly inspired those near him with confidence and courage.
First World War Zonnebeke, 4th October 1917
Citation: For conspicuous bravery and leadership. Lt Col Evans took his battalion in perfect order through a terrific enemy barrage, personally formed up all units, and led them to the assault.
While a strong machine gun emplacement was causing casualties and the troops were working round the flank, Lt Col Evans rushed at it himself and by firing his revolver through the loophole, forced the garrison to capitulate.
After capturing the first objective he was severely wounded in the shoulder, but refused to be bandaged, and reformed his troops, pointed out all future objectives, and again led his Battalion forward. Again badly wounded, he nevertheless continued to command until the second objective was won, and, after consolidation collapsed from loss of blood.

As there were numerous casualties he refused assistance, and by his own efforts ultimately reached the dressing-station. His example of cool bravery stimulated in all ranks the highest valour and determination to win.